Showing posts with label Retro. Show all posts
Showing posts with label Retro. Show all posts
Sunday, May 27, 2012

Tuesday, January 31, 2012
New found Freedom
Don't let me fool you, I totally only wore those shoes for the photos! I will say that when I opt for heels that I normally go for wedges. They are more comfortable and easier to walk in and no matter what heels I wear my feet are going to feel like they might fall off, so I need all they help I can get.


OOTD-
Tanks & Jeans- F21
Cardigan- target
Suede wedges- New look (like 2 years ago)
Necklace & bracelets- F21

So with my tax return, I need to get new glasses! The ones I have now are so old that the protective coating is flaking off. It like constantly looking through a dirty window. With my new found freedom I am finally getting to do what I want and not having to adhere to rules! I think I might get some cat eye glasses or something equally awesome and vintage inspired.
I'm really enjoying having purple hair and I have been getting a lot of complements too. I'm also getting a lot of looks and a lot of questions about how I did it. Living in a tiny town full of super conservative types is probably not the most conducive to my new creative and free outlook. 
So with my tax return, I need to get new glasses! The ones I have now are so old that the protective coating is flaking off. It like constantly looking through a dirty window. With my new found freedom I am finally getting to do what I want and not having to adhere to rules! I think I might get some cat eye glasses or something equally awesome and vintage inspired.
Friday, January 27, 2012
Champagne Cupcakes
These turned out so good. I loved the strong champagne flavor accompanied by the sweetness of the frosting, it made a really good combo.
Ingredients:
Cake:
- 12 tablespoons (1 1/2 sticks) unsalted butter, softened
- 1 1/2 cups sugar
- 2 cups all-purpose flour
- 2 teaspoons baking powder
- 1/4 teaspoon salt
- 6 large egg whites (3/4 cup)
- 3/4 cup Champagne
- 2 teaspoons vanilla extract

Frosting:
1/2 cup butter or margarine, softened
4 cups powdered sugar
1/4 cup champagne
1 teaspoon vanilla
4 to 5 drops red food color

Makes 18-ish cupcakes
Preheat oven to 350 degrees

Bake for 20-25 minutes until a tooth pick pulls out clean.
Enjoy champagne while you wait!!!

Let cool on rack completely, then ice. I chose to adorn with some white candies that reminded me of bubbles. ENJOY!!!!

Happy Friday everyone! Have a good weekend and I will see you on Sunday.
Don't forget to subscribe. :)
Tuesday, January 24, 2012
Purple People Eater... Eat your heart out!
When I started out on this adventure my first thought was "I wanna look like a Mermaid. Oh, or a Unicorn!" I Google imaged Unicorn hair and got a whole lot of awesome stuff, but nothing to really help me out. My hair to start out with was a tinge of lavender so I figured I would roll with it and just make it more extreme. Thanks to a butt load of you tube videos and Kaylah from The Dainty Squid(she had some awesome hair advice and tips) I embarked on a shopping journey. I pick up two purple-y colors and some conditioner to mix in so that it came out a pastel-ish color

I have some roots but not bad enough to bleach my hair. So I threw on an old tee and said good bye to by blonde hair!

I mixed the color, doing equal parts conditioner to dye. To be honest I was nervous about this because in hair school we always used conditioner to repel dye. P.S. did you notice that in the above picture, I'm missing half an eyebrow? :) Haha Anyways, Jim slapped on some gloves and helped me slather the color on.


I decided to slice in some of both colors to create dimension. I thought it would add to the Unicorn effect!
I let the dye sit for two hours. That's when I did yesterday's blog post! Normally with colorful dyes like the package says to only leave it on for a 20-30 minutes, but realistically you can leave it on as long as you like. There is no peroxide or ammonia in these types of dyes to harm your hair. I usually leave dye on for 2-3 hours.

I'm pretty attractive in this picture! When I rinsed my hair out I used cold water. You wanna used as cold as you can stand. This will lock in your color. It also helps if you use a Sulfate free shampoo. From now on I'm going to keep a bottle in the shower with a mixture of what I like to call "Unicorn juice", it's a mixture of the hair dye and conditioner, that that it's like getting a tough up every time you take a shower. Let your Unicorn juice sit on your hair for 5-10 minutes in the shower and it will give your mane a fresh blast of color.


I'm pretty happy with how it turned out. I think when I bleach my roots in a couple weeks I do another update and let you know how it went, but in real like I totally look like a unicorn. On a side note, Jim wanted to join in the fun and he decided he wanted to be a dragon, so he dyed his beard green!
Monday, January 23, 2012
Storms A Brewin'
This is the outfit I was wearing in yesterdays video. I really liked it and thought I would share it with all of you! I bought these jeans online from Forever 21 and I was a little nervous about them fitting, but they look pretty good. They are not very thick jean material, I normally go for thicker material because the thinner stuff gives me what Jim calls (front butt). Haha. I can't believe I just wrote that and now am going to talk about "front butt" on the Internet! Front but is wear your pants are snug enough to make a dent in your belly and well, it looks like a butt. From time to time this happens to even the most put together of us chubby chicks. The thinner the pants are the more noticeable, or more often the front butt phenomena may happen.
I'm going to start off by saying I used to hate Uggs. With a Passion! I hated seeing girls in the city with Uggs and mini skits on. What is the point of that. Living in California I often see people wearing leg warmers with flip flops and I have been guilty of wearing scarves with t-shirts, but the Uggs trend just sent me over the edge. This may stem from the fact that my college professor drilled it into our brains that Uggs were made by the devil. To him Uggs being worn anywhere except Australia was like going outside your house in Pajama pants. I refused to fall into the Ugg trend... until I moved to the woods. I still refused to pay for Uggs so I settled for the off brand Uggs (what I like to call Fuggs) I wear my Fuggs when it's super cold, raining real bad, or light snow. I live basically at the snow line. At my house we get 3 or 4 really good snow storms during the winter, but literally if you drive ten minutes from my house, you are in a chain zone, people are snowed in, and out of power at least half the winter. Now Fuggs are not good for lots of snow because they don't have a whole lot of traction, but a light dusting is ok. So the point of me saying that is because It was raining pretty bad yesterday, hence me wearing my Fuggs! With the impending snow coming tonight I'm held, Jim and I stocked up on foods, filled our netflix Que and I stocked up on crafty things. It's supposed to hit tonight and we will see how bad it really it.
I think it's a little funny that just a few posts ago I was talking about how it feel like spring in January and now we are held up in the house waiting for the storm to pass! Oh well. What is the weather like were you live?

OOTD-
Black and stripy tank- target (I think)
Red Bow tank & Necklace- Forever 21
Blue Black jeans- forever 21
Fuggs- Payless shoes
Cardigan- Ross
Hair flower- Local Salon


Thanks for stopping by. Be safe everyone and until next time tootles. Don't forget to Subscribe :)
Wednesday, January 11, 2012
Whimsical spring nails in the winter
I was inspired by the fact that it's January and it's 70 degrees outside! Normally at this time of year we would have had at least 3 good snow storms already. I live in a tiny town close to Yosemite, CA. and we have our share of bad weather, but it's a little alarming that we haven't had any this year yet. Maybe it's because it snowed in July of last year, or maybe this is Al Gore's wrath saying "I told you so" about global warming. Whatever it is, I'm not minding it.
I thought that I would do a nail tutorial to celebrate 1.) me going back to work. and 2.)the delightfully warm weather we are having right now. I started off by pushing back my cuticles, buffing my nails and putting on a coat of primer. I used the same Sally Hansen primer I used in my last tutorial. Once the primer dried I chose two pastel colors, a light minty color and a lavender color that I mixed myself. I chose to go with alternating color choices and painted every other nail.

Next used a dotting tool (a toothpick) and I made 2-3 yellow dots on the fingers that had the minty color on them. These dots are going to be the stamens for the little flowers. My pinkie nail is real short so I decided to just do one flower instead.

Now it's time to pick your flower color. I went with pink for an extra spring-y vibe. I took a hot pink color I had and mixed it with white nail polish. I swirled the white in, but not all the way, giving it a marble effect. I did this so each flower would look a little different and a little more lifelike. I used the dotting tool once again to make dots around the stamen to look like flower petals. I did about 5 dots for each flower ( I found that if I did more, it started to look like a blob.) . I also used my white nail polish and a small paint brush to make stripes on the lavender nails. I chose to do them vertically, but you can do them either way. I found that doing wider set lines looked better as well. I tried one nail with 7 stripes and it looked awful. I ended up having to start over on that nail. Also, my hands are not super steady and I found that if I set the brush down almost parallel to my nail, and set the brush on my nail and dragged back that I got a straighter more even line, as opposed to just using the tip of the brush. It made for more of a mess on my fingers, but it cleaned off just fine with remover.

As a finishing touch I took a dark green nail polish and my dotting tool (again, a toothpick) and made little leaves for each flower. Once I let things sit for a minute, I put on a topcoat. I like using the Sally Hansen insta-dry top coat, just because it drys in less then a minute.


Wednesday, January 4, 2012
DIY Jewelry hanger and room tour!
One of the things I would like for the new year fashion wise is to think more about accessories more. With that being said I also would like to be more organized this year. Both in mind, I started browsing the web looking for a jewelry hanger. I love the old looking bird cage ones, and the ones that look like trees. I found lots of cool ones, but with price tags of upwards of $45 I said "I could totally just make one myself!". SO I DID! I found everyday things that I had that would match my room decor and set out on a craft-venture.
My room is very bold when it comes to color choices. These colors were not my choices, our old roommate painted the room when she moved in, when she moved to Portland we moved rooms so that we could re-do the flooring in our old room, and then we kinda just stayed. The bold red, black and white of the color makes finding things that fit with the decor of our room a little difficult.
When Jim and I got married we had mix and match vintage china at each table. We had a few left over that didn't match anything so I knew that I could use those in some way for my jewelry display. From there I found some old knobs, wooden thread spools, thimbles, and and champagne corks. Frank promptly came over and stole the corks and chewed them to pieces!


I decided that I wanted to decoupage the plate with pattern pieces. I grabbed some more stuff that I thought I might need and that would be helpful.

I decoupaged all the plates and when they dried I gorilla glued the picture hangers on the back. A warning for people using this glue. This was my first time using this glue and it says that it expands, but when my dabs of glue dried they expanded so much that I couldn't fit anything under the hanger. I ended up having to chizzle away part of the glue to make it work, but since no one sees the back it didn't need to be pretty!


After all the glue was dry and all your doo-hickies are attached, lay out your plates in the arrangement of your liking . Nail to the wall and enjoy your new jewelry hanger!!!!!!


With all the photos being taken, I figured I might as well show off my room, so here are a couple pictures of my lovely room....
 |
| My old bike wheel, filled with memories! |
 |
| Pictures of my g-rents, engagement pics, bart cards and more! |
 |
| My handsome man, kinda looks like Morrissey. |
 |
| A robot head really works in any room! |
 | |||
| Good boys! |
Wednesday, December 14, 2011
Houston, we have landing.... Etsy store is up and going strong!
My poor chubby fingers have been hard at work, typing, photographing and blogging about THE NEW ETSY STORE!!!!!! It's finally up and running and we have a decent amount of stuff. This partnership with lovely Mrs. L is going swell. She picks up where I lack (grammar big time) and comes up with witty descriptions when I have a brain fart. I'm still off work, which gives me ample time to craft, especially when I don't feel good and imprisoned to the couch. At this moment though, I'm super happy with how this has all turned out. Our little shop is getting ample amounts of views without any marketing too. Once we sell a couple things we will start thinking about marketing and adds and google words and all that fun stuff. Other then that not to update on, and my brain is a little fried right now so I will leave you with some Outfit of the day photos and will try to chronicle my baking adventures tomorrow.Oh here is the link to the Etsy store.


OOTD-
Dress and boots- New Look
Sweater- Ross
Leggings- Target
Fascinator- Etsy shop!


Thursday, December 8, 2011
OOTD with a side of Cheesecake!
Cheesecake bars are the bastard child of lemon bars and cheesecake. They are possible the most delicious thing I have ever put in my mouth. An added bonus is that they are pretty easy to make as long as you have a mixer. The first time I make them I did not have one and creaming cream cheese is not easy with an old vintage crank hand mixer. So I made a wise investment and broke down and bought a new electric hand mixer. It makes things so much easier. Ok so on with the tutorial....
you will need...
5 Tbsp butter, softened
1/3 c brown sugar
1c flour
1/2 c sugar
1 (8ounce) packet cream cheese
1 egg
2Tbsp milk
1 1/2 Tbsp lemon juice
1/2 Tsp vanilla
1. Heat oven to 350
2. Blend the butter, brown sugar and flour in a bowl. mix until it is the consistency of course sand. Set aside 1c of this mixture for the top of your bars.

3. In a 8 x 8 inch pan, spray non-stick spray or coat with butter. Press the remaining crumb mixture into the coated pan.

4. Bake for 15 minutes.
5. While crust is baking combine the sugar and cream cheese into a bowl. Mix until cream cheese is smooth again.
6. add the egg,lemon juice, vanilla, and milk into the cream cheese mixture and blend until all ingredients are combined.
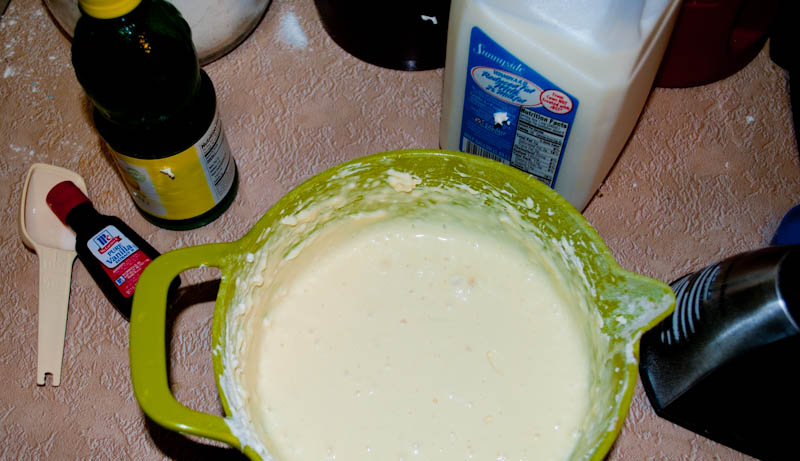
7. pour cream cheese mixture over your baked crust and top with the remaining crumble.
8. Bake for another 50-55 minutes until, toothpick come out clean from the center of bars.

9. Let stand for an hour to set up all the way, then enjoy with friends and family or indulge by yourself!
On a side note, Jim managed to score a vintage kitchen aid mixer and has been restoring it for me for Christmas. I'm so super stoked and my baking aspirations have been boosted to the next level! We have been re-arranging our house and making it more "grown up", honestly it feel so good to have a house that is ours and not some place we live.
On a side side note , I took a couple pictures of what I wore the other day to run errands. I love this skirt and try to wear it as often as possible without people thinking "didn't she just wear that?"
 |
| This ring is from New Look , I always get a million compliments on it when I wear it. |

OOTD-
Sweater and leggings- Target
T-shirt- Wal-mart
Lips Skirt- Forever 21
Flats- Payless
Bow- DIY, soon to be on my Etsy store!


Have a great day everyone and Etsy updates should be comin' up real quick!
Subscribe to:
Posts (Atom)